Enable Google Authentication
In this tutorial, we'll walk through the process of adding authentication using Google OAuth 2.0 to an existing application. Firstly, we will learn how to configure the project to use Google OAuth 2.0 and then we will modify the client and the backend to use it.
Preparing the setup
First of all, you have to install genezio if you haven't installed it already.
npm install genezio -g
The application that we are building is a very simple one. It has three screens: a login screen and a page that displays a secret that we only want to show to authenticated users.
Clone the application by running the following command:
git clone https://github.com/Genez-io/genezio-react-google-oauth.git
Navigate to the directory where you cloned the repository from GitHub and execute genezio deploy to deploy the project.
genezio deploy
Now, you can open your web browser to the URL of your app and start exploring. The React app includes a /login route for logging in and a / route that reveals the secret.
Bypass the login process, by navigating directly to /. Press the "Reveal secret" button and the secret is displayed. That's a problem! Our secret is exposed to everyone; we need to update the application to ensure only authenticated users have access to the secret.
Creating an Google OAuth 2.0 application
First, we have to create a new project in Google Cloud. Navigate here and create a new project if you don't have one already. Enter a name and click on "Create".
Once the project is created, you need to configure an OAuth Consent screen. Select "External" since the application that we build is available to all users that have a Google account. Enter the details of your application and when you are done, select "Save and Continue".
Next, we can move on to the part where we generate a pair of Google Client ID and Google Client Secret that you will need further on to enable the Google auth provider in Genezio. Click on "Credentials" and the "OAuth client ID" to create a new pair of Client ID and Client Secret. Select "Web Application" since we are building a React web app. Also, add the URL of the web app both the local version and the deployed one in the "Authorized Javascript Origin" field. This is a very important step, otherwise the Google Login button won't be displayed because you didn't configure your domain as a trusted one.
You are now ready! Save the Google ID and Google Secret that we will use in the next step.
Enable Genezio Authentication
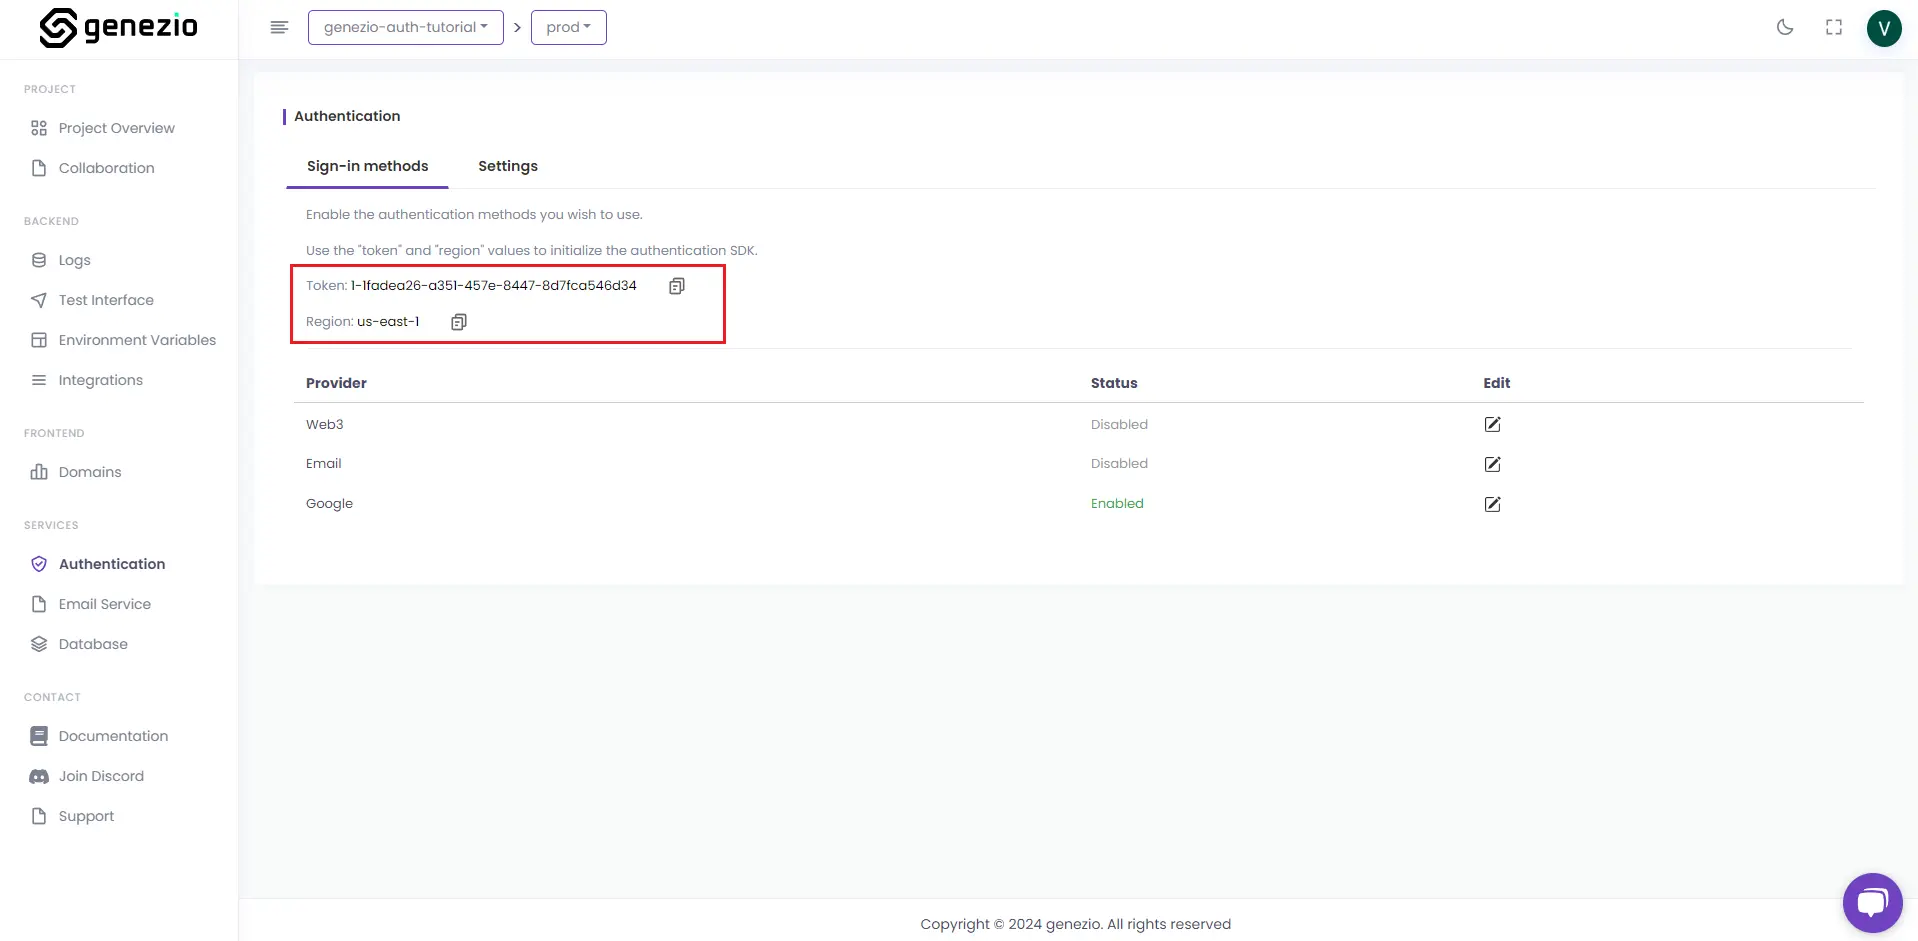
Let's start by enabling Genezio Authentication. Go to the dashboard of your project on https://app.genez.io. Click on Authentication sidebar.
Select PostgreSQL as the database type and select or create a new database. Click "Enable". This will take a couple of seconds, Genezio is deploying the AuthService class in your project. Once this is finished, click on the "Google" provider and set the values from the previous step.
That's all the setup that we need for today! We can now get straight to coding.
Implement UI
To display the Google Login button and to handle the entire Google OAuth flow, we will use @react-oauth/google library. Install it like this in the client/ folder:
npm install @react-oauth/google
Next add the following code. Import the GoogleOAuthProvider that you can use to wrap around the router of the application. We then need to configure the authentication token and region by replacing <token> and <region> with your own values that you can find the Authentication screen in the dashboard.
import React from "react";
import ReactDOM from "react-dom/client";
import { createBrowserRouter, RouterProvider } from "react-router-dom";
import "./index.css";
import SecretView from "./routes/secret";
import Login from "./routes/login";
import { GoogleOAuthProvider } from "@react-oauth/google";
import { AuthService } from "@genezio/auth";

// Change <token> and <region> with your own values!
AuthService.getInstance().setTokenAndRegion("<token>", "<region>");

const router = createBrowserRouter([
  {
    path: "/",
    element: <SecretView />,
  },
  {
    path: "/login",
    element: <Login />,
  },
]);

// Change <google_id> with your own value!
ReactDOM.createRoot(document.getElementById("root")!).render(
  <React.StrictMode>
    <GoogleOAuthProvider clientId="<google_id>">
      <RouterProvider router={router} />
    </GoogleOAuthProvider>
  </React.StrictMode>
);
Let's now modify the Login component to display the Google Login button. First, we import the GoogleLogin component from @react-oauth/google. We will need a loading state for when the button is pressed. Upon pressing the button, the handleGoogleLogin callback will be triggered. Depending on the state, we display either the Google Login button or a 'Loading' text.
When the callback is called, we make a request to the AuthService using the googleRegistration method. When a user logs in with Google for the first time, a new user account is added to the database. Afterward, the auth token is saved in the browser's memory, and it's used for all future requests. Everything happens behind the scenes and you don't have to worry about it.
import React, { useState } from "react";
import { CredentialResponse, GoogleLogin } from "@react-oauth/google";
import { AuthService } from "@genezio/auth";
import "./styles.css";
import { useNavigate } from "react-router-dom";

const Login: React.FC = () => {
  const navigate = useNavigate();
  const [googleLoginLoading, setGoogleLoginLoading] = useState(false);

  const handleGoogleLogin = async (credentialResponse: CredentialResponse) => {
    setGoogleLoginLoading(true);
    try {
      await AuthService.getInstance().googleRegistration(
        credentialResponse.credential!
      );

      console.log("Login Success");
      navigate("/");
    } catch (error: any) {
      console.log("Login Failed", error);
      alert("Login Failed");
    }

    setGoogleLoginLoading(false);
  };

  return (
    <div className="form-container">
      {googleLoginLoading ? (
        <>Loading...</>
      ) : (
        <GoogleLogin
          onSuccess={(credentialResponse) => {
            handleGoogleLogin(credentialResponse);
          }}
          onError={() => {
            console.log("Login Failed");
            alert("Login Failed");
          }}
        />
      )}
    </div>
  );
};

export default Login;
Let's now see how we can protect the getSecret method so that it is only callable by authenticated users.
Protect methods
By default, all methods in genezio classes are publicly available. If you want to make a route protected and only accessible by authenticated users, you have to use a middleware called @GenezioAuth and a GnzContext object as a first parameter.
import {
  GenezioDeploy,
  GenezioMethod,
  GenezioAuth,
  GnzContext,
} from "@genezio/types";

@GenezioDeploy()
export class BackendService {
  readonly secret = "Capybaras are AWESOME! Shhh... don't tell the cats!";

  @GenezioMethod()
  @GenezioAuth()
  async getSecret(context: GnzContext): Promise<string> {
    console.log(context.user);
    return this.secret;
  }
}
Now, whenever BackendService.getSecret() is called from the frontend, the token will automatically be attached to the context object. The GenezioAuth middleware will verify the token's validity and query the AuthService to determine the token's owner. If a user is associated with that token, their details will be added to the context.user property. If the token does not exist or is invalid, @GenezioAuth will throw an error, preventing the method from being called.
And we are done, you can now test it out. If you navigate to the secret page without going first through the login process, the BackendService.getSecret() will throw an error and you will be automatically redirected to the login page again.
Congratulations! You've implemented a full stack application that has Google Login functionality! You can check out the final code at this link.