In this tutorial, I am going to show you how to create your first Web3 application on Ethereum using genezio and Blast API. You don’t have to know anything beforehand to follow along. I will introduce you to the most basic blockchain concepts and tools to get you from zero to hero in Web3 development. Excited? Let’s get started 🤩
After following through with this tutorial, you’ll be able to:
- Create a wallet with Metamask
- Use Blast API to connect to the Ethereum Mainnet
- Use NodeJS and Mongo DB to build a smart contract indexer to get the events happening on a blockchain
- Use React to develop a minimalist frontend
- Deploy a full stack application on genezio
You can find the complete project on Github . Feel free to take a look at it to better understand how the complete project should look.
If you get stuck along the way or you have any questions, don’t hesitate to contact me on Discord or write me an email at andreia@genez.io. I am more than happy to help 😄
Contents
Introduction
What are you going to build?
Today, you are going to build a smart contract indexer application. This app will be able to allow users to query events related to smart contracts on various blockchain networks. For this example, I chose to show you how to connect to the Ethereum Mainnet .
Following, I am going to break down the steps you are going to get through:
- Install dependencies and set up your project
- Implement the server (backend) side of the project using NodeJS and genezio
- Implement the client (frontend) side of the project using React
- Test and deploy your application using genezio
Technical Tutorial
This step is going to introduce you to quite a few new tools for interacting with a blockchain. Don’t worry if you’ve never worked with them because I am going to walk you through every new concept.
Install genezio
To start implementing your first Web3 app, you’ll need to host it somewhere on the cloud where it can be easily accessed by your users.
You will use genezio to deploy your project quickly and easy with just a single command.
If you don’t have node and npm installed on your machine, head over to their documentation page to set them.
Install genezio using npm:
npm install genezio -g
Start using genezio by running the following command in your terminal:
genezio login
At any step, if you get stuck at any moment you can use genezio help or genezio [command] help to get more help with the tool.
Create the project
Create the folders hierarchy for the project:
genezio create fullstack --backend=js --frontend=react-js --name=blockchain-project --region=us-east-1
Implement the server-side
Change into the newly created server folder:
cd /blockchain-project/server
Install the web3 and mongoose npm packages by executing:
npm install web3 mongoose
These npm packages will be used to interact with the blockchain and to save the events triggered on the blockchain in a Mongo database.
Create a .env file in the blockchain-project/server directory.
server/.env

# Replace these values with your own
CONTRACT_ADDRESS = <todo-paste-the-contract-address-here>
BLAST_API_RPC_ENDPOINT = <todo-paste-the-blast-api-rpc-endpoint-here>
MONGO_DB_URI = <todo-paste-the-mongo-db-uri-here>
Create an abi.js in the blockchain-project/server directory and paste there the Ethereum bytecode of the smart contract:
server/abi.js

export const abi = <todo-paste-the-abi-here>
Expand each of the following sections to get the necessary variables (CONTRACT_ADDRESS, abi, BLAST_API_RPC_ENDPOINT, MONGO_DB_URI) if you don’t have them already.
Get a smart contract address and ABI - Application Binary Interface
Get a smart contract address and ABI (Application Binary Interface)
Head to
OpenSea
and choose the cutest NFT collection from trending.
Open the collection and select “View on EtherScan”.

EtherScan
is an analytics platform for smart contracts deployed on the Ethereum blockchain. Here you can see all of the events managed by this smart contract under the “Events” tab.
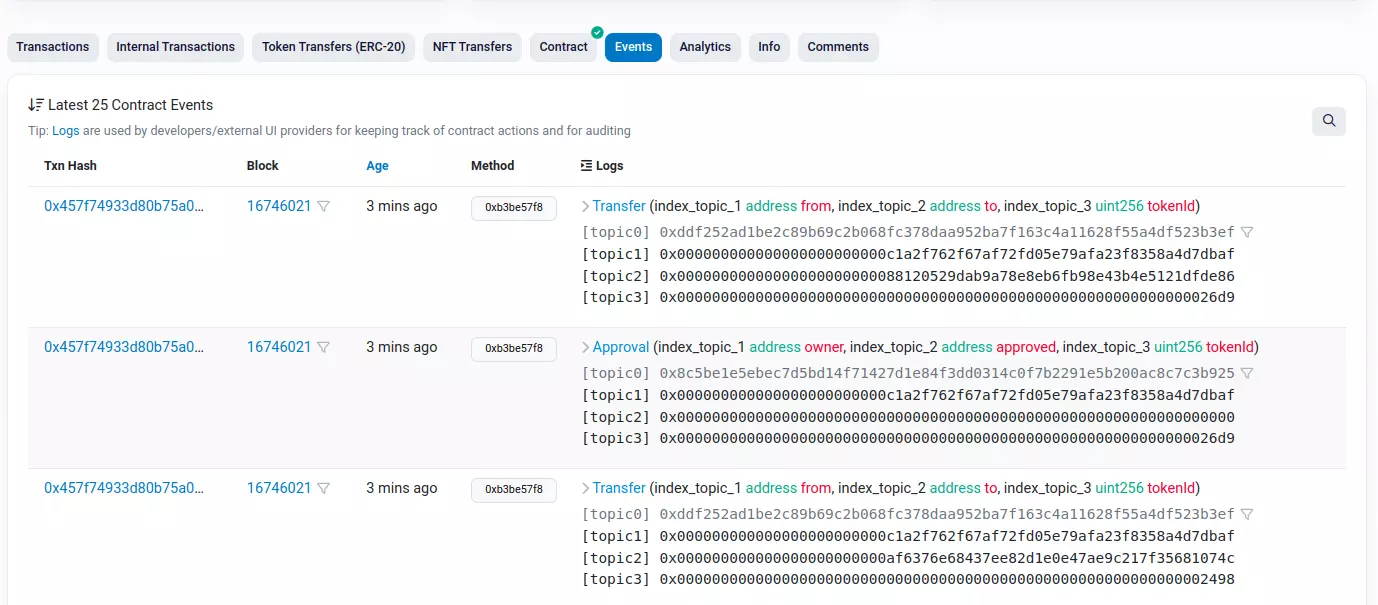
What is important on this page is:
- The contract address - think of it as a unique name for the smart contract
Copy the contract address from the main page and paste it in the
.envfile in theblockchain-project/serverdirectory.

- The ABI - the binary that the Ethereum Virtual Machine knows how to execute.
Click on the “Contract” tab and scroll down to the “Contract ABI” section. Copy it from here and paste it in the abi.js file in the blockchain-project/server directory.

Get access to an Ethereum endpoint using Blast API
Create a wallet with Metamask
Metamask
is a browser extension that will allow your browser to access the Ethereum blockchain. More than that, Metamask will also allow you to manage your ETH transactions. Install Metamask on your machine following the steps from their page.
Note to yourself - Remember the password you set because it will be useful in the next steps.
When you successfully finish this step, your screen should look like this:
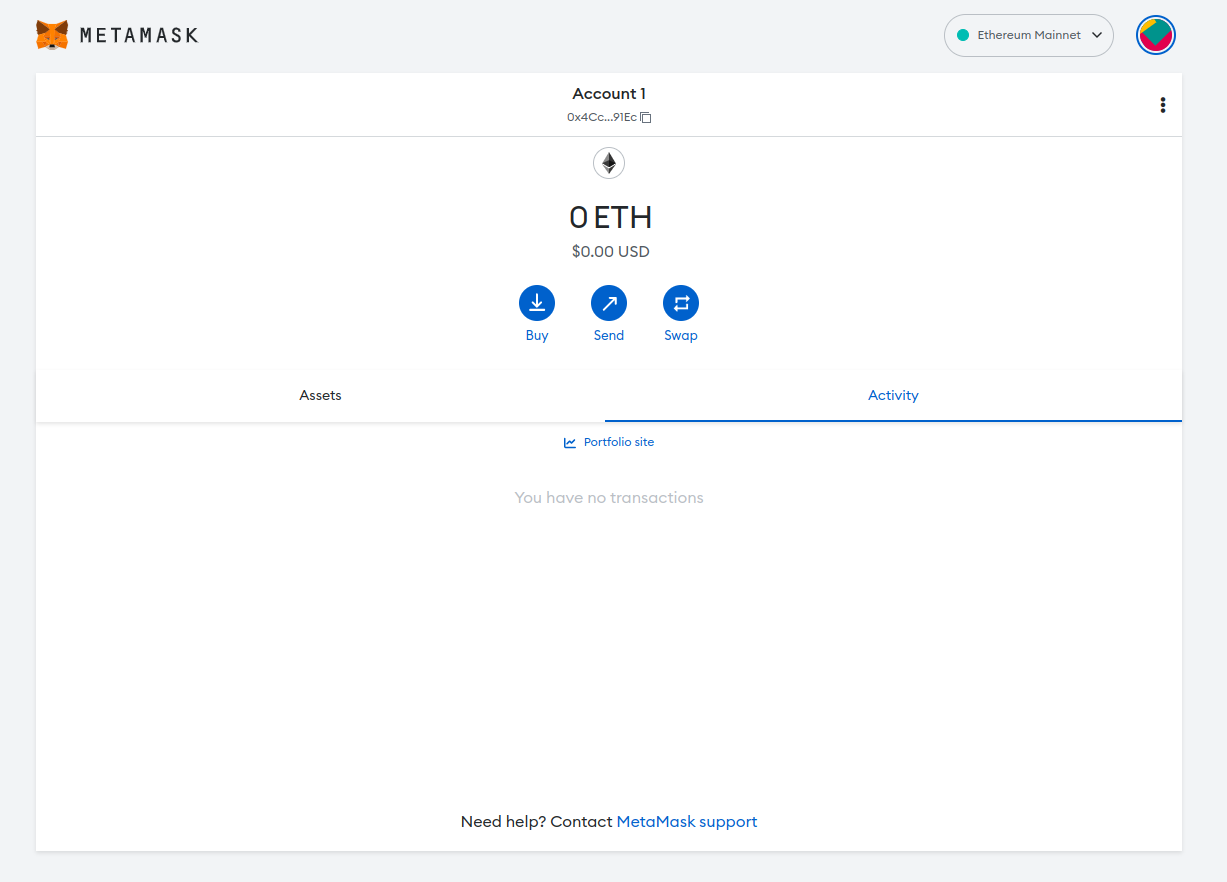
The wallet created with Metamask will be used to connect to an Ethereum endpoint using Blast API in the next step.
Get access to an Ethereum endpoint using Blast API
A blockchain is very similar to a public network of machines. In order to connect to the network you either need to plug your machine into the network and receive an IP address of your own, or you can remotely connect to an existing machine and use it to interact with the network.
To interact with a given blockchain, you can either host and add your node to the blockchain or access an existing node. In this tutorial, we are going to use Blast API to get an endpoint to an existing node from the Ethereum Mainnet.
Head over to the
Blast API webpage
and click on “Get Endpoint” - this will allow you to interact with the blockchain using an existing node.
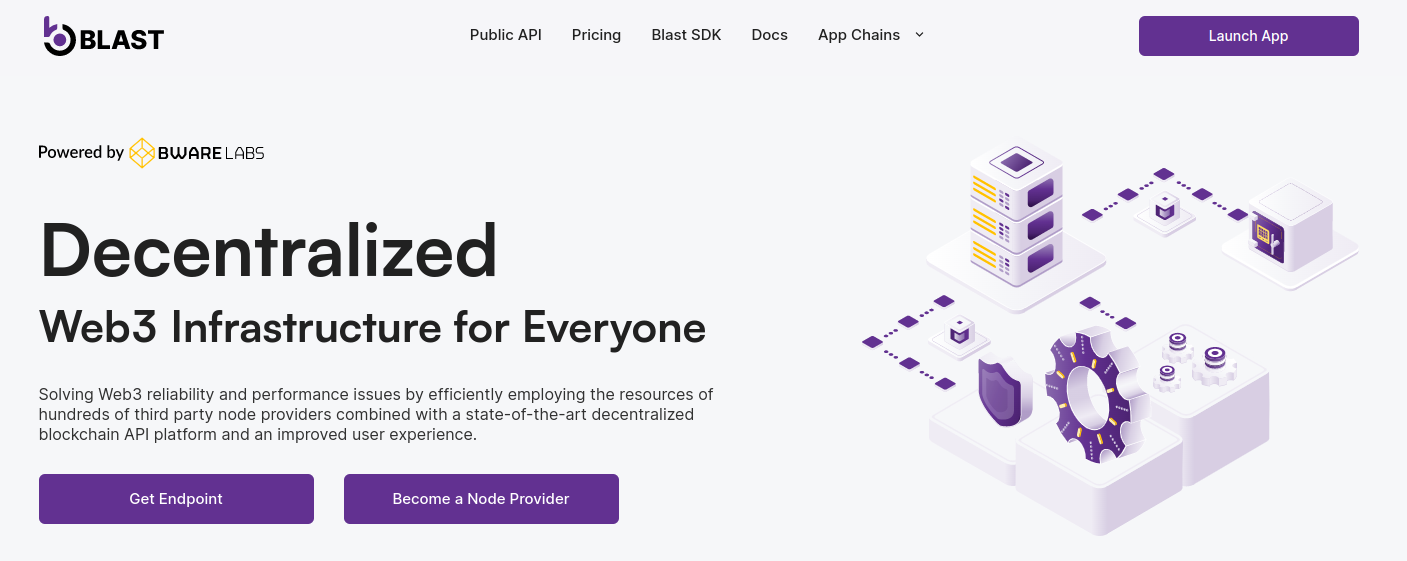
From there, select “Create a Consumer App” and connect using your Metamask wallet. Follow through the pop-ups that are appearing on your screen.

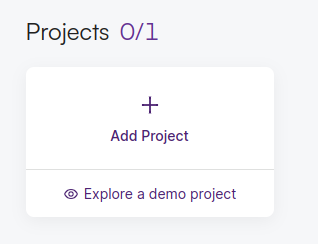
Now you can set up a project to get access to an Ethereum endpoint. Select “Add a new project”.
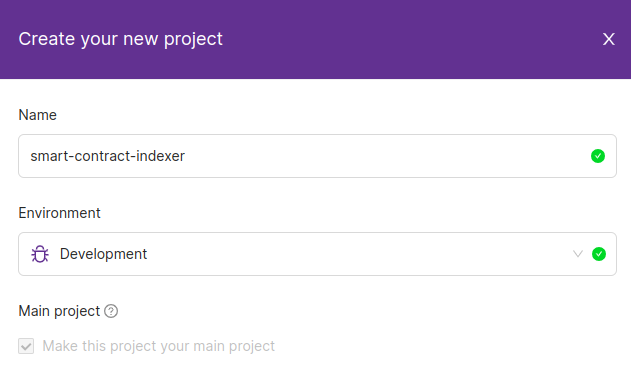
Enter a project name and select the “development” environment. After you are happy with the name, hit the “Create project” button.
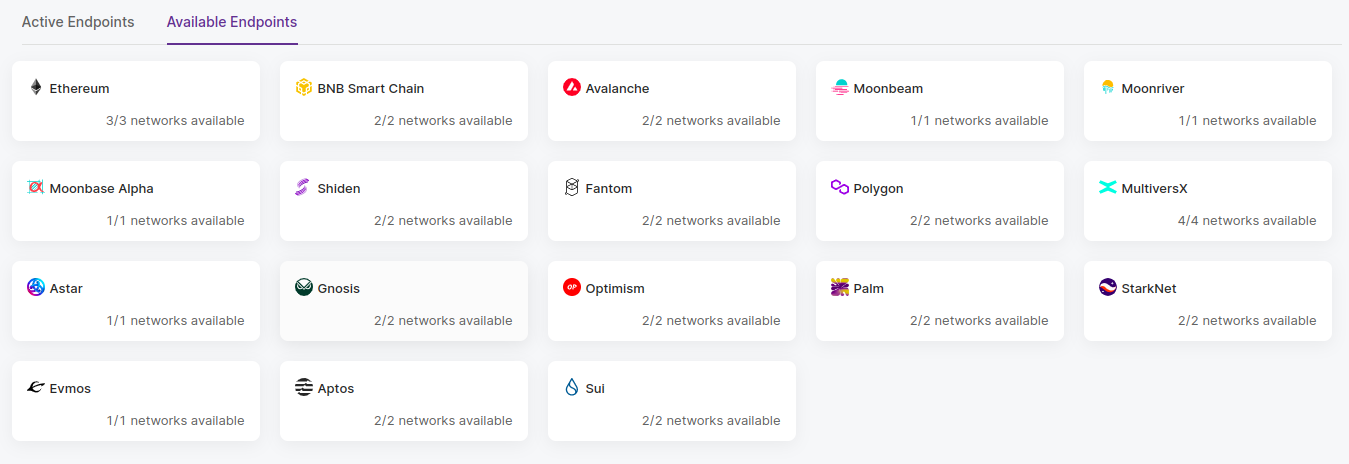
A dashboard with your active endpoints will appear. For now, there is no endpoint you are connected to, so let’s change that. Head to the “Available Endpoints” tab and select “Ethereum” and, then, “Ethereum Mainnet”.
Congrats 🥳 Now you are connected to an Ethereum node.
To be able to interact with the node in your application, click on the* “Active Endpoints”*, on the “Ethereum” widget and copy the RPC endpoint and paste it in the .env file in the blockchain-project/server directory.

Create a Mongo Database
Create a Mongo Database
You will need to set up a Mongo Database to store the events that are triggered on the smart contract. Follow the steps from this tutorial to create a free Mongo Database on
MongoDB Atlas
and integrate it within your genezio project.
After you get a Mongo Database URI, add it to the .env file in the blockchain-project/server directory.
Create a Mongo database model to save the events triggered on the smart contract.
Create a new models folder in the blockchain-project/server directory.
Inside the models folder, create an event.js file and add the following code snippet:
server/models/event.js

import mongoose from "mongoose";
const eventSchema = new mongoose.Schema({
  id: String,
  name: String,
  parameters: Map,
  blockNumber: Number,
  logIndex: Number,
});
export const EventModel = mongoose.models.Event || mongoose.model("Event", eventSchema);
Create a blockchain.js file in the blockchain-project/server directory with a class name BlockchainServer. The class will have a constructor that will initialize the services used by the application - the endpoint to the Ethereum Blockchain using Blast API and it will set up the smart contract of your selected NFT.
server/blockchain.js

import Web3 from "web3";
import { abi } from "./abi.js";
import { EventModel } from "./models/event.js";
import { mongoose } from "mongoose";
import { GenezioDeploy, GenezioMethod } from "@genezio/types";
/**
 * The Blockchain server class that will be deployed on the genezio infrastructure.
 */
@GenezioDeploy()
export class BlockchainServer {
  constructor() {
    mongoose.connect(process.env.MONGO_DB_URI).catch((err) => {
      console.log(err);
      throw err;
    });
    try {
      this.web3 = new Web3(process.env.BLAST_API_RPC_ENDPOINT);
      this.contract = new this.web3.eth.Contract(JSON.parse(abi), process.env.CONTRACT_ADDRESS);
    } catch (err) {
      console.log(err);
      throw err;
    }
    this.knownEventTokens = this.contract.options.jsonInterface.filter((token) => {
      return token.type === "event";
    });
  }
}
Add a method in the class BlockchainServer to decode events from the blockchain. This method is going to be private.
server/blockchain.js

/**
 * Private method that decodes an event and returns the name and the parameters.
 *
 * This will not be callable using the genezio SDK. Only the public methods are exposed publicly.
 *
 * @param {*} event
 * @returns An object containing the name of the event and its parameters.
 */
#decodeEvent(event) {
  // Retrieve the event declaration from the ABI
  const eventToken = this.knownEventTokens.find((knownEventToken) => {
    return knownEventToken.signature === event.topics[0];
  });
  if (!eventToken) {
    console.log('cannot process log %d', event.logIndex);
    return undefined;
  }
  // Decode the event
  const decodedEvent = this.web3.eth.abi.decodeLog(
    eventToken.inputs,
    event.data,
    event.topics.slice(1),
  )
  // Parse the parameters in a simple dictionary
  const parameters = {}
  eventToken.inputs.forEach((input) => {
    parameters[input.name] = decodedEvent[input.name]
  })
  return {
    name: eventToken.name,
    parameters,
  }
}
Add a method that will sync the events triggered on the smart contract and index them in our database. This method will be called periodically by configuring a scheduled expression (cron).
server/blockchain.js

  /**
   * Method that will be called periodically by the genezio infrastructure to index the events.
   *
   * The creation of an Ethereum block will take up to 12 seconds.
   *
   * The frequency with which the method will be called can be modified from the genezio YAML file.
   *
   */
  @GenezioMethod({ type: "cron", cronString: "* * * * *" })
  async sync() {
    // Get the current block number and request the last 100 blocks
    let events;
    let blockNumber;
    const bigIntNumber = BigInt(100);
    try {
      blockNumber = await this.web3.eth.getBlockNumber();
      events = await this.web3.eth.getPastLogs({
        address: process.env.CONTRACT_ADDRESS,
        fromBlock: blockNumber - bigIntNumber,
        toBlock: blockNumber,
      });
    } catch (err) {
      console.log(err);
      return;
    }

    console.log(`New sync started with ${events.length} to save`);

    for (const event of events) {
      const decodedEvent = this.#decodeEvent(event);

      if (!decodedEvent) {
        continue;
      }

      // Insert the missing events.
      try {
        await EventModel.findOneAndUpdate(
          { id: `${event.transactionHash}-${event.logIndex}` },
          {
            $setOnInsert: {
              id: `${event.transactionHash}-${event.logIndex}`,
              name: decodedEvent.name,
              parameters: decodedEvent.parameters,
              blockNumber: event.blockNumber,
              logIndex: event.logIndex,
            },
          },
          { upsert: true }
        );
      } catch (err) {
        console.log(err);
        return;
      }
    }
  }
Lastly, add a method to get the saved events from the database.
server/blockchain.js

  /**
   * Method used to get all the events in a paginated way.
   *
   * @param {*} from The starting index of the first event.
   * @param {*} limit The number of events that will be part of the response.
   * @returns
   */
  async getEvents(from, limit) {
    console.log(
      `Received getEvents request with from = ${from} limit = ${limit}`
    );
    let count;
    let events;
    try {
      count = await EventModel.countDocuments({});
      console.log("Event count", count);
      events = await EventModel.find(undefined, undefined, {
        skip: from,
        limit,
        sort: { blockNumber: -1, logIndex: -1 },
      });
    } catch (err) {
      console.log(err);
      return { success: false, err: err };
    }

    return {
      count,
      events: events.map((event) => ({
        id: event.id,
        name: event.name,
        parameters: event.parameters,
        blockNumber: event.blockNumber,
      })),
    };
  }
Implement the client-side
In this section, you’ll build the client side of the project. This is going to be a simple React app.
Go to the client where you’ll build the frontend application.
cd ../client
Install the following packages to get Material React UI components:
npm install @mui/material @emotion/react @emotion/styled
Modify src/App.js as follows:
src/App.js

import { useEffect, useState } from "react";
import Pagination from "@mui/material/Pagination";
import List from "@mui/material/List";
import ListItem from "@mui/material/ListItem";
import ListItemText from "@mui/material/ListItemText";
import "./App.css";
import { BlockchainServer } from "@genezio-sdk/blockchain-project";
import { Alert } from "@mui/material";

const CHUNKS = 10;

function App() {
  const [totalCount, setTotalCount] = useState(0);
  const [currentIndex, setCurrentIndex] = useState(0);
  const [events, setEvents] = useState([]);

  const [errorAlert, setErrorAlert] = useState("");

  useEffect(() => {
    setCurrentIndex(0);
  }, []);

  useEffect(() => {
    // Use the SDK to get events from the BlockchainServer class hosted on genezio
    BlockchainServer.getEvents(currentIndex, CHUNKS)
      .then((response) => {
        if (!response) {
          setEvents([]);
          setErrorAlert(
            `Unexpected error: ${
              response.err
                ? response.err
                : "Please check the backend logs in the project dashboard - https://app.genez.io."
            }`
          );
          return;
        }
        setEvents(response.events);
        setTotalCount(response.count);
      })
      .catch((error) => {
        console.error("An error occurred!", error);
        setEvents([]);
      });
  }, [currentIndex]);

  const handleChange = (param, value) => {
    setCurrentIndex((value - 1) * CHUNKS);
  };

  return (
    <div className="App">
      <header className="App-header">
        <h1>Genezio Smart Contract Indexer</h1>

        {errorAlert != "" ? (
          <Alert severity="error">{errorAlert}</Alert>
        ) : (
          <List sx={{ width: "100%", maxWidth: 360, bgcolor: "background.paper" }}>
            {events.map((event) => (
              <ListItem>
                <ListItemText
                  primary={event.name}
                  secondary={event.blockNumber + " " + JSON.stringify(event.parameters)}
                />
              </ListItem>
            ))}
          </List>
        )}
        <div>
          <Pagination count={Math.floor(totalCount / CHUNKS)} onChange={handleChange}></Pagination>
        </div>
      </header>
    </div>
  );
}

export default App;
Test your project locally
It is recommended to test your project locally before deploying it to make sure that everything works as expected. Execute the following commands to change the directory and start a local testing process:
Make sure that you are in the root directory:
cd ../server
Run the following command to start a local testing process:
genezio local
Your screen should look like this:
Server listening on port 8083
Your local server is running and the SDK was successfully generated!
   ╭──────────────────────────────────────────────────────────────────────╮
   │                                                                      │
   │   Import your classes like this:                                     │
   │   import { BlockchainServer } from "@genezio-sdk/blockchain-project" │
   │                                                                      │
   ╰──────────────────────────────────────────────────────────────────────╯

Test your code at http://localhost:8083/explore
Right now the server side of your project is listening to port 8083. You can head to localhost:8083/explore to interact with it from the GUI.
You can also test the client side of your project. Do not stop the genezio local process. Open up a new terminal and head over to the blockchain-project/client directory. There you can execute the following commands:
npm install
npm run dev
You can now interact with your project from the browser at http://localhost:5173 .
Deploy your project
Prepare the configuration for your server before deploying it.
To deploy both the backend and frontend of your app, go to the blockchain-project directory and deploy it with genezio. Hang in there because it might take a while.
genezio deploy
After the project has been successfully deployed, your terminal should look like this:
Deploying your backend project to genezio infrastructure...

Your backend code was deployed and the SDK was successfully generated

   ╭────────────────────────────────────────────────────────────────────────────────╮
   │                                                                                │
   │   To install the SDK in your client, run this command in your client's root:   │
   │   npm add @genezio-sdk/blockchain-project@1.0.0-prod                           │
   │                                                                                │
   │   Then import your classes like this:                                          │
   │   import { BlockchainServer } from "@genezio-sdk/blockchain-project"           │
   │                                                                                │
   ╰────────────────────────────────────────────────────────────────────────────────╯

Deploying your frontend to genezio infrastructure...

No subdomain is specified in the genezio.yaml configuration file. We will provide a random one for you.

App Dashboard URL: https://app.genez.io/project/<projectId>/<projectEnvId>
Frontend URL: https://<subdomain>.dev.app.genez.io
Congrats again 🥳 Now you can manage your project from the genezio Dashboard - you can test it, check the logs, or delete it if you don’t need it anymore.
I hope you enjoyed this tutorial and I encourage you to check out our other tutorials for more tips and tricks on developing your ninja developer skills 🥷 💻
Article contents
Subscribe to our newsletter
Genezio is a serverless platform for building full-stack web and mobile applications in a scalable and cost-efficient way.
Related articles
More from Tutorials
