GENEZIO CLOUD
Deploy serverless worldwide
at a fraction of the cost
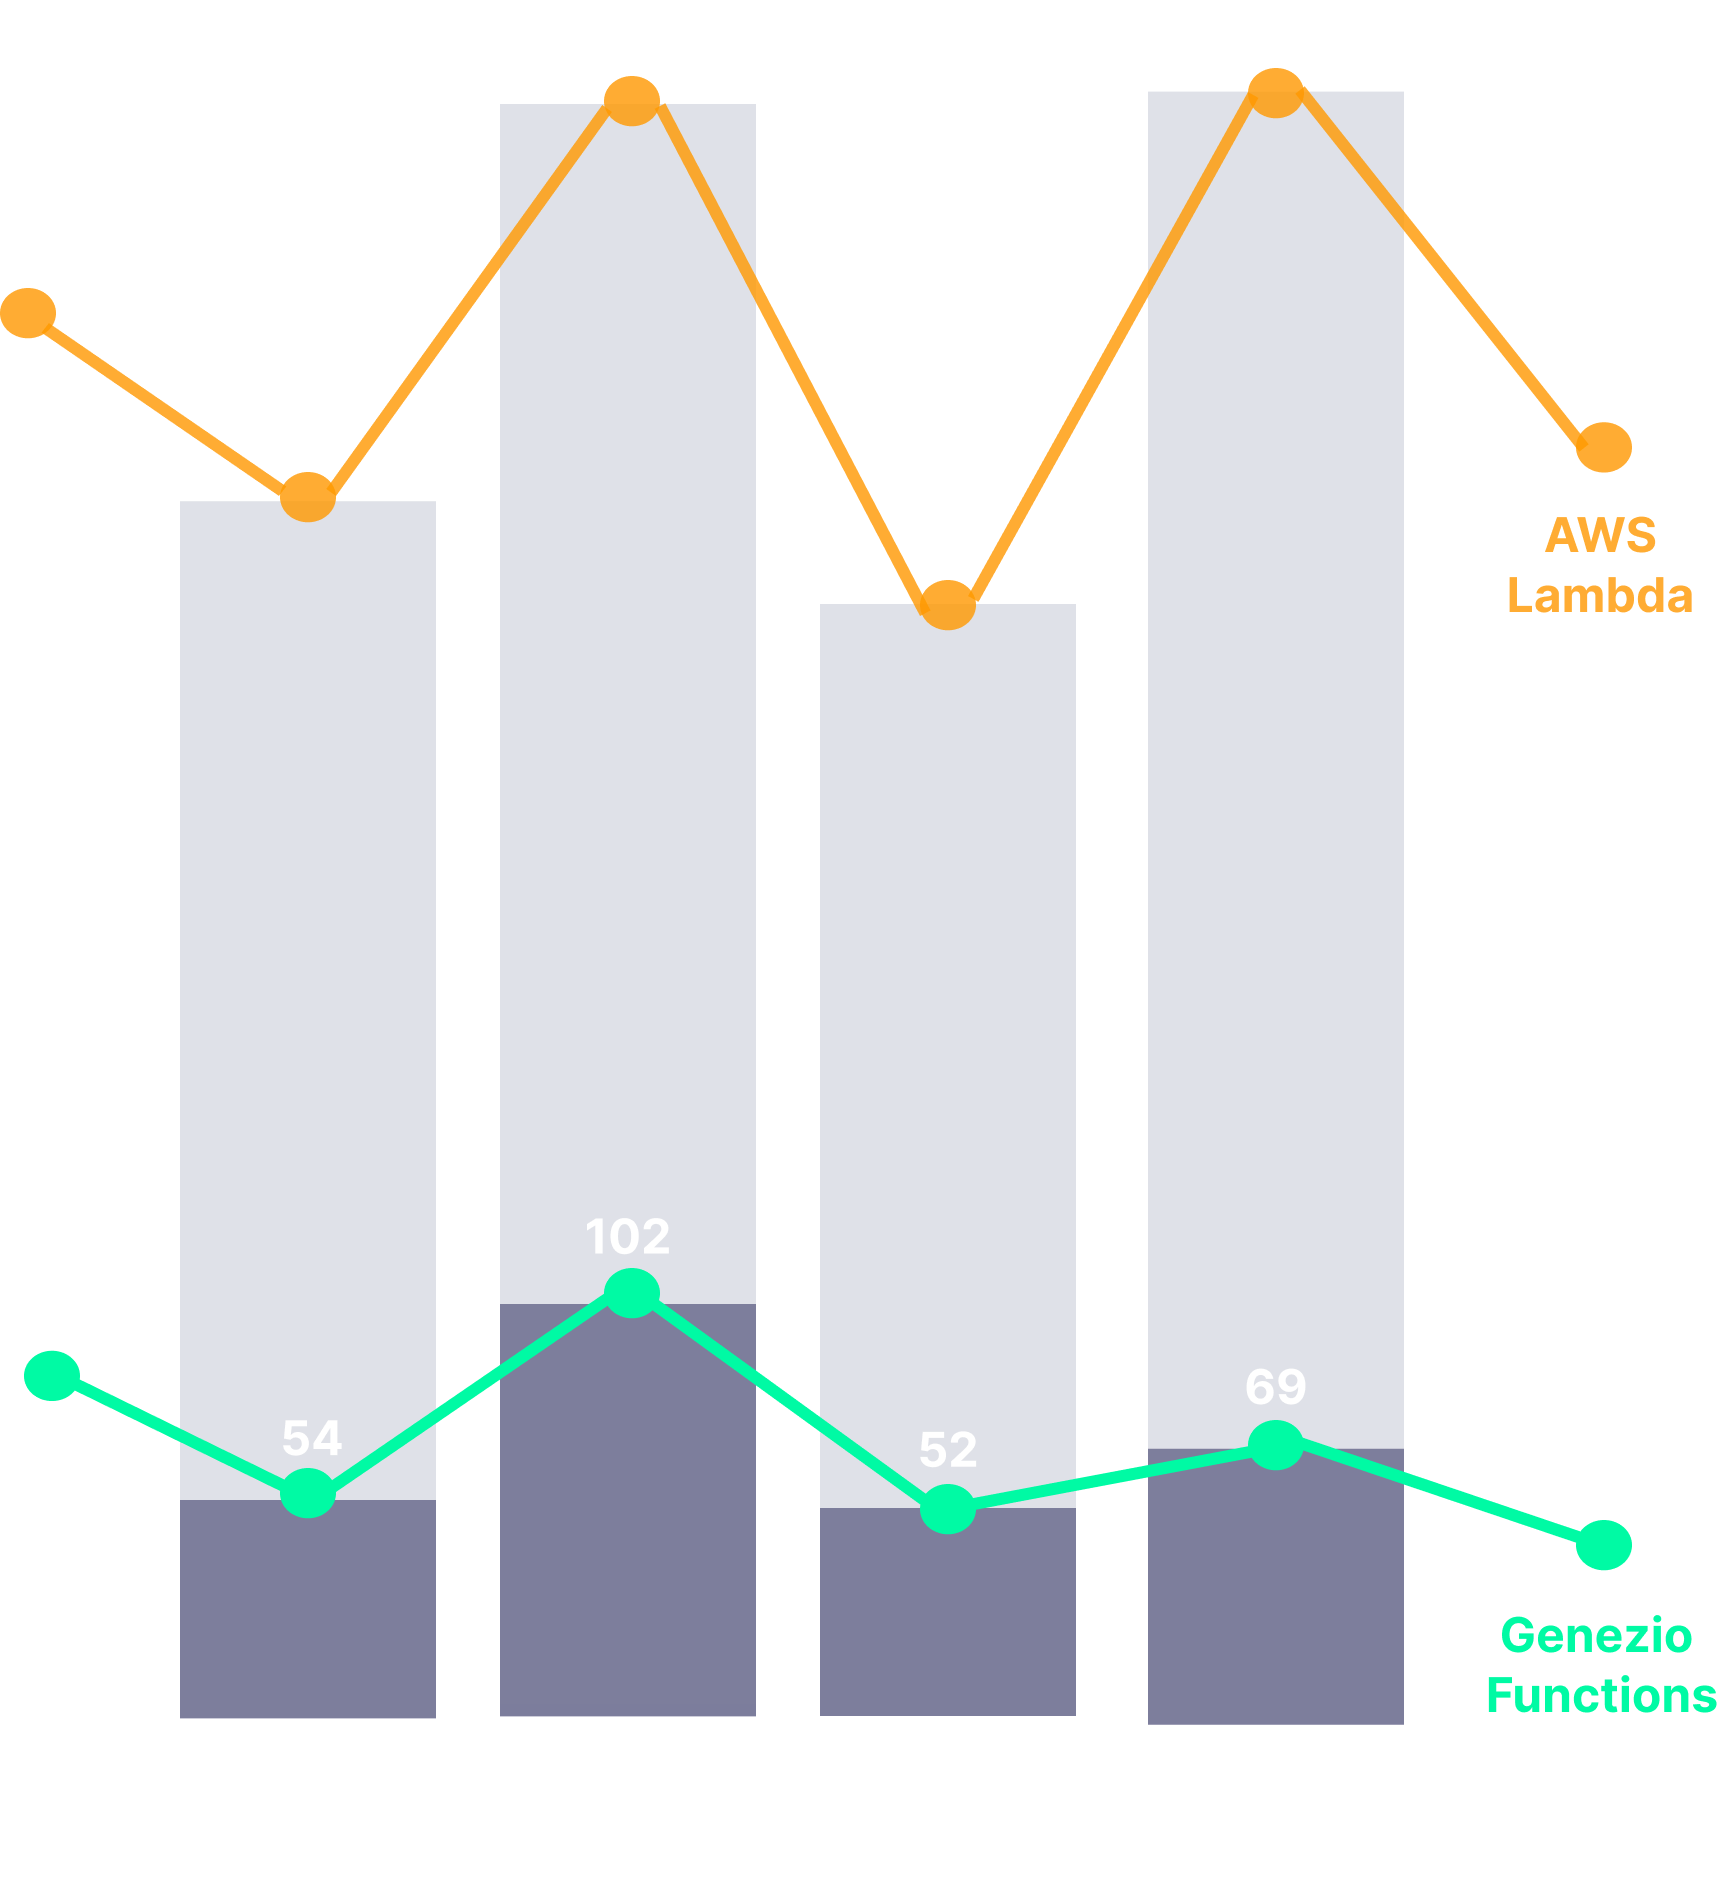
Deploy and run code without provisioning or managing servers, similar to AWS Lambda, Azure Functions, Google Cloud Functions, and Vercel or Netlify Functions but more cost-effective and faster.
USED AND TRUSTED AT
CAPABILITIES
Key features of Genezio Functions
Reduced Cold Start Time
Experience faster initialization times, ensuring that your functions are ready to handle requests immediately.
Learn more ->Easy Deployment
Deploy effortlessly with Genezio's intuitive CLI. Quick to install and simple to use, it streamlines your deployment process, letting you focus on coding.
Learn more ->Cost-Effective Pricing
Genezio’s predictable pricing model makes deploying serverless applications up to 6x more affordable than traditional solutions.
Learn more ->Automatic Scaling
Genezio Functions automatically scale to meet demand, maintaining optimal performance regardless of traffic volume.
Frameworks
Deploy complex apps like Express.js and Next.js serverless with a single click, simplifying the deployment process.
Integrated Services
Utilize additional Genezio Services, including typesafe feature, databases, auth, cron jobs to build complete and dynamic applications.
USE THE FRAMEWORK YOU LOVE
Featured Community templates you can deploy
GENEZIO SERVICES
Genezio Native Features & Services
Enjoy the benefits of a function-as-a-service infrastructure and enhance your development with Genezio's Services to optimize your workflow and maximize performance.
#1 Open Source Typesafe SDK
Simple and type-safe microservices development
One of Genezio's most exciting features is guaranteed type safety between backend services and clients. This is enabled by the autogenerated SDK, which constructs types that match the server-side types used for RPC calls exposed to clients.
Start adding type-safe features to your project or create one from scratch.
Get started
#2 Database Integration
Serverless, fully-managed databases
Genezio offers on demand databases that are provisioned through our partners. This means that you can create a database in a few seconds without having to worry about the infrastructure, scalability or maintenance of it.
Get started
#3 Seamless Authentication Integration
Authentication
You can use Genezio Auth to allow the users to sign in into your app using multiple providers such as email and password or Google. This is an out-of-the-box authentication backend, with support for Postgres and Mongo databases and a client SDK to easily integrate the authentication feature into your frontend.
Get started
#4 Easy Task Scheduling
Repeating Schedule
Genezio enables effortless cron job scheduling, allowing you to automate tasks and maintain consistent performance. Set up and manage scheduled tasks in seconds, without worrying about infrastructure, scalability, or maintenance. Let Genezio handle the rest.
Get started
EDUCATION
Our latest article
TESTIMONIALS
Don't take our word for it

Daniel M
CEO @DeFiBuilder
Using their SDK, I was able to deploy complex functionalities with an ease that I hadn't experienced before. The integration process is so streamlined and user-friendly that even those with a basic understanding of JavaScript can navigate it with confidence.

Cosmin Gamanusi
SWE @Bware Labs
Genezio has significantly improved my development workflow, both for my startup projects and at work. The platform enables me to quickly develop, test, and deploy new features. Its ease of integration allowed my team to offload work seamlessly, enhancing our productivity. Genezio’s efficient and user-friendly interface has made it a valuable tool in our development process.

Laurentiu Ciobanu
CTO @Sessions
It was a pleasant and frictionless experience: from my TypeScript code to the cloud in less than 3 minutes (including creating an account, installing the CLI, and logging in with the CLI).
FAQ