Andreia Ocanoaia
Apr 30, 2024
The last couple of months brought a new wave of keywords and concepts that are concerning every software developer out there.
As a curious individual, I started exploring the novel AI landscape to uncover how I can leverage these technologies for my personal projects and enhance my work productivity as a software engineer.
In this article, I delve into how you can feed external data to an already trained LLM model to enable more accurate and reliable answers.
More specifically, I want to build a bot that can answer questions based on the documentation pages of genezio like in the preview below:
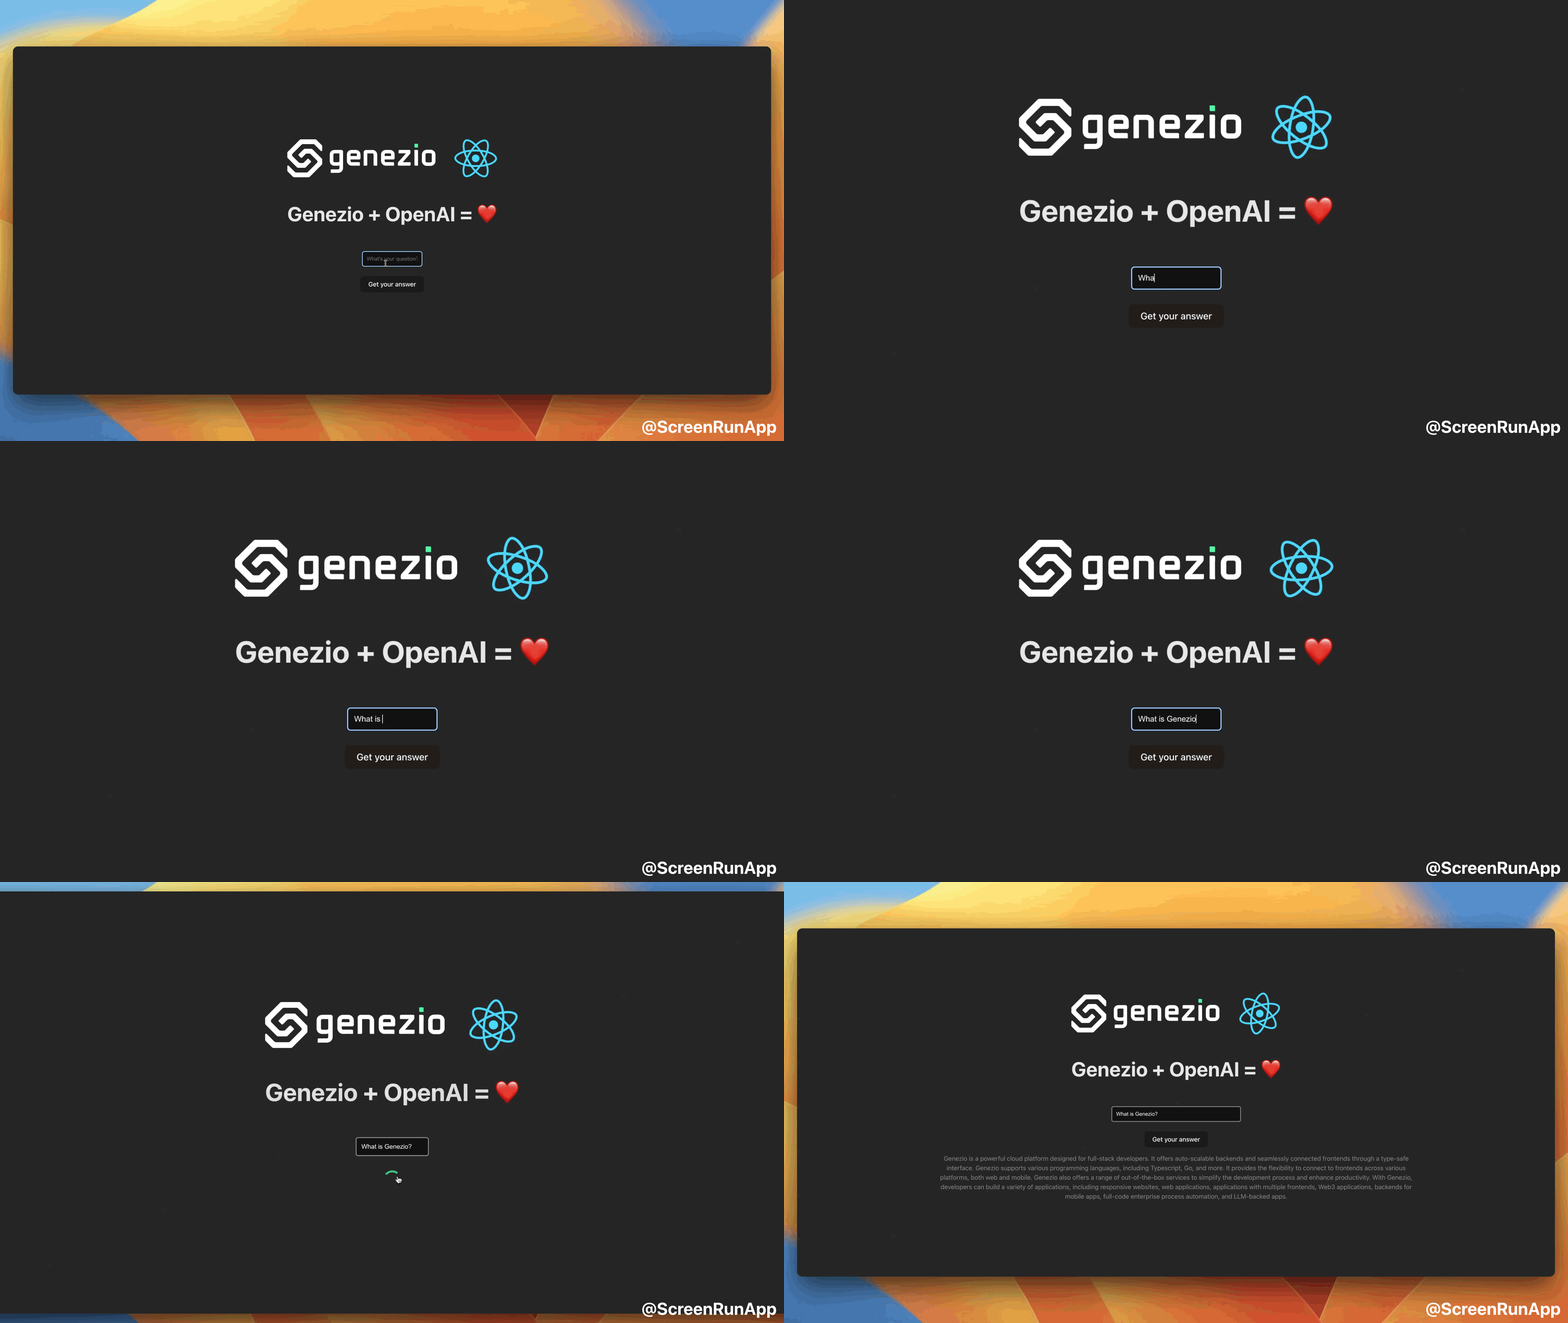
You can use this project as a starting point to build more complex applications such as:
- FAQ bots for customer support
- Q&A bots for educational purposes
- AI-powered documentation search engines
If you want to directly jump to a working project, you can clone the
following repository
and paste your custom data in server/data.
Follow the instructions in the README to deploy your project and you’ll have a bot that can answer questions based on your custom data.
The concepts
Some of the main issues of out-of-the-box models are:
- Outdated information - being trained on old data they can easily provide old fashioned answers. For example, ChatGPT will tell you to use
create-react-appfor starting a new project, even though the library has been deprecated for a while now. - Lack of new information - it can’t provide answers for new technologies or concepts that are not present in the training data.
- Hallucinations - making up false information when it doesn’t find an answer.
To solve these points, you can provide the information needed to a pre-trained model. There are two approaches on feeding custom data to an LLM:
- Fine-tuning: This approach involves training the model on your custom data. The model will learn to generate responses based on the custom data you provide. This approach requires AI/ML knowledge and a lot of computational resources.
- Retrieval-based or RAG: This technique enables generative AI/LLM to process data from external resources. This involves querying the external resources to extract only the relevant context for the question asked. This context will be appended to the prompt such that the model will make use of more information and can give up to date and accurate responses. This approach is simpler, requires less computational resources and can be used with pre-trained models such as OpenAI, Gemini or Llama.
In this article, we will use the retrieval-based approach because it’s simpler, faster to implement and great for prototyping a product based on LLM.
Vector databases
The first step in creating a RAG application is to gather and create the external data that will be used to enhance the model’s responses.
The brute-force approach is to append the data to the prompt each time and let the model figure out how to use it. This can get quite expensive and the prompts can get so large that they’ll max out the model’s input size.
To optimize this process, we can use a vector database - a database that stores your custom text data into LLM embeddings and it’s able to retrieve the most similar context to a given query. To better understand how this works, let’s take a look at the following code snippet:
const loader = new TextLoader("./genezio_docs.txt");
// Load the data into documents
const documents = await loader.load();
// Save the data as OpenAI embeddings in a table
const vectorStore = await vector_database.fromDocuments(documents, embeddings, {
  table
});

// Query the database for the most similar context to the word "genezio"
const genezio_info = await vectorStore.similaritySearch("genezio", 1);

// This will output the sentences that are most similar to the word "genezio" from the file loaded
console.log(genezio_info);
Thus, by asking the question “What is Genezio?”, you would not feed the entire documentation page to the model (that would be too expensive). Instead, you would query the vector database for the most similar context to the word “genezio” and feed that context to the model. This way, you can provide the model with the most relevant information to generate a response in the most optimal way.
How to feed personal data to an LLM
To be able to easily build tailored LLM applications, you can use the LangChain framework. This framework provides a set of tools that allow you to do the following:
- Easily query the vector database for the most similar context to a given question.
- Feed the retrieved context to an LLM model.
- Chain multiple contexts from different sources (multiple databases, web scraping, multiple prompts) and feed them to the model.
The simplified flow of the application is as follows:
// Create a retriever that will query the database for the most similar document to the input question
const vectorStore = new LanceDB(new OpenAIEmbeddings(), { table });
// Retrieve the most similar context to the input question
const retriever = vectorStore.asRetriever(1);
// Create an output parser that will convert the model's response to a string
const outputParser = new StringOutputParser();

// Create a pipeline that will feed the input question and the database retrieved context to the model
const setupAndRetrieval = RunnableMap.from({
  context: new RunnableLambda({
    func: (input: string) =>
      retriever.invoke(input).then((response) => response[0].pageContent)
  }).withConfig({ runName: "contextRetriever" }),
  question: new RunnablePassthrough()
});

// Feed the input question and the database retrieved context to the model
const chain = setupAndRetrieval.pipe(prompt).pipe(model).pipe(outputParser);
// Get the model's response
const response = await chain.invoke(question);
console.log("Answer:", response);
return response;
Deploy your own LLM application
Your projects will bring you more value when they are accessible from all over the internet.
To help you easily deploy without managing servers on your own, we will use genezio - a cloud platform designed for web and mobile developers.
Clone the example
Clone the following repository and navigate to the typescript/langchain-starter directory:
git clone https://github.com/genez-io/genezio-examples
cd genezio-examples/typescript/langchain-starter
Get an OpenAI API key
Go to the OpenAI Dashboard and create an OpenAI API key. This key will be used to interact with the OpenAI API to create embeddings and generate responses.
To keep your API key secure, store it as an environment variable in the server/.env file:
server/.env

OPENAI_API_KEY="<your_openai_api_key>"
Try out the application locally
Expand this section to install genezio
If you don’t already have it on your machine, you can install genezio with your favorite package manager:
npm install -g genezio
And log in to your account:
genezio login
To test the application locally run the following command:
genezio local
This command will start your fullstack application locally.
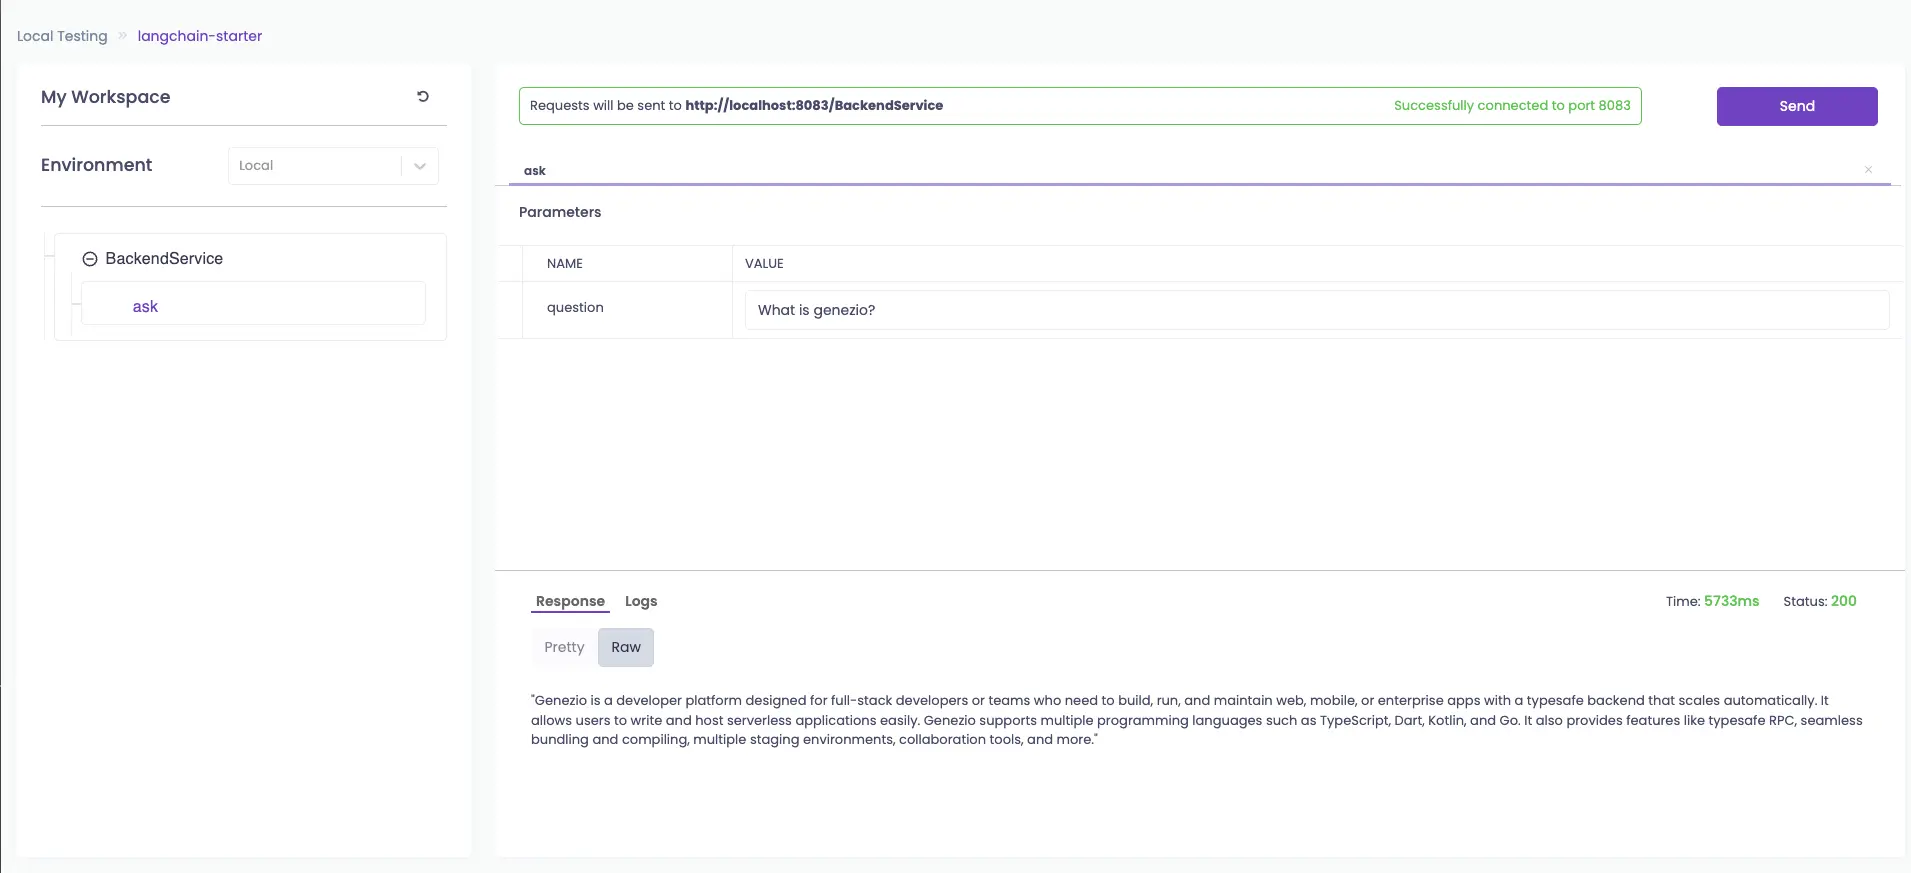
You can send requests to the backend API directly by navigating to http://localhost:8083/explore:
You can also test the application directly from the frontend at http://localhost:5173/.
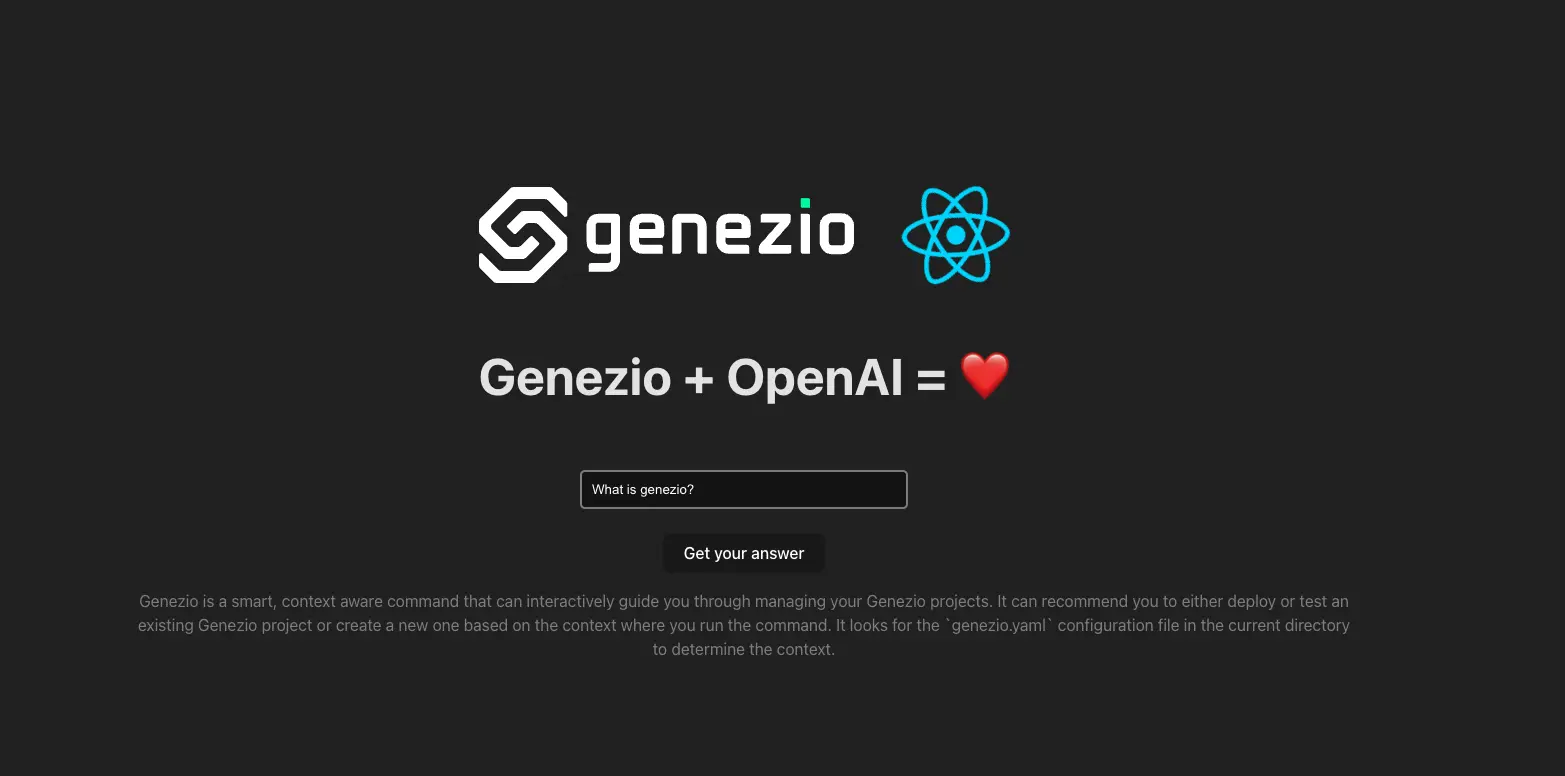
Initially, the bot will provide information about genezio. You can customize the bot with your own data in the next step.
Set your custom data
You can use your own dataset provided either in local markdown files, S3 buckets, as a webpage or GitHub repository.
For this tutorial, I advise you to create a directory named data and a file named data.txt and fill it with custom data.
├── server/
    ├── .env
    ├── data/
    │   ├── data.txt
    ├── backend.ts
    ├── package.json
    └── tsconfig.json
How the vector database is populated
Initially, you need to create and populate the vector database with your data. We will use LanceDB to store the data in a vector database.
The advantage of using LanceDB is that it’s an embedded vector database - meaning it will be bundled alongside your source code and it can be accessed directly without needing to connect to a separate server. This approach makes the querying process faster for large amounts of data.
Let’s explore what’s in
server/createVectorDatabase.ts
file. The method createVectorDatabase() is responsible for creating vector database and fill it with the data from data/data.txt.
The first steps performed in the code flow are (1) initializing the embeddings model the and (2) creating a table in the vector database:
export async function createVectorDatabase() {
  // Set the OpenAI API key
  const OPENAI_API_KEY = process.env.OPENAI_API_KEY;

  // Use the OpenAIEmbeddings model to create embeddings from text
  const embeddings = new OpenAIEmbeddings({ openAIApiKey: OPENAI_API_KEY });

  // Set the database path
  const databasePath = "./lancedb";

  // Create the database directory if it doesn't exist
  if (!fs.existsSync(databasePath)) {
    fs.mkdirSync(databasePath);
  }

  // Connect to the database
  const database = await lancedb.connect(databasePath);

  // Create a table in the database called "vectors" with the schema corresponding to a TextLoader
  const table = await db.createTable(
    "vectors",
    [{ vector: Array(1536), text: "text-sample", id: 1 }],
    // Overwrite the database if it already exists
    { writeMode: lancedb.WriteMode.Overwrite }
  );
}
Now, the data can be loaded from the text file ./data/data.txt and saved as OpenAI embeddings in the table:
// Load the data from a text file
const loader = new TextLoader("./data/data.txt");
// Load the data into documents
const documents = await loader.load();
// Save the data as OpenAI embeddings in a table
const vectorStore = await LanceDB.fromDocuments(documents, embeddings, {
  table
});
To test that the database has been populated correctly, you can add the following code that queries the database for the most similar context to the word “genezio”:
// Query the database for the most similar context to the word "genezio"
const genezio_info = await vectorStore.similaritySearch("genezio", 1);

// This will output the sentences that are most similar to the word "genezio" from the file loaded
console.log(genezio_info);
This code snippet appended at the end of the file will actually create the vector database when the Node.js script is run:
(async () => {
  console.log("Creating the LanceDB vector table.");
  // Create the LanceDB vector table
  await createVectorDatabase();
  console.log("Successfully created the LanceDB vector table.");
})();
Before deploying or test locally, you have to run the createVectorDatabase.ts as a Node.js script.
You can run the script by executing the following command in the terminal:
cd server && npx tsx createVectorDatabase.ts
The vector database is now populated with the data from data/data.txt and can be used to create a custom-data LLM-based application.
Explore the bot implementation
Let’s explore how to the bot itself is implemented. The complete code is available in the
server/backend.ts
file.
Firstly, the OpenAI API key is set and the OpenAI model is initialized:
@GenezioDeploy()
export class BackendService {
  constructor() {}

  async askBot(question: string): Promise<string> {
    const OPENAI_API_KEY = process.env.OPENAI_API_KEY;
    if (!OPENAI_API_KEY) {
      throw new Error(
        "You need to provide an OpenAI API key. Go to https://platform.openai.com/account/api-keys to get one."
      );
    }

    // Define the OpenAI model
    const model = new OpenAI({
      modelName: "gpt-4",
      openAIApiKey: OPENAI_API_KEY,
      temperature: 0.5,
      verbose: true
    });

    // Define the prompt that will be fed to the model
    const prompt = ChatPromptTemplate.fromMessages([
      [
        "ai",
        `Answer the question based on only the following context.
If the information is not in the context, use your previous knowledge to answer the question.

{context}`
      ],
      ["human", "{question}"]
    ]);

    // Set the database path
    const database = "./lancedb";
    // Connect to the database
    const db = await connect(database);
    // Open the table
    const table = await db.openTable("vectors");

    return "";
  }
}
Now, you need to create a retriever that will query the database for the most similar document to the input question.
// Initialize the vector store object with the OpenAI embeddings and the table
const vectorStore = new LanceDB(new OpenAIEmbeddings(), { table });
// Retrieve the most similar context to the input question
const retriever = vectorStore.asRetriever(1);
// Create an output parser that will convert the model's response to a string
const outputParser = new StringOutputParser();

// Create a pipeline that will feed the input question and the database retrieved context to the model
const setupAndRetrieval = RunnableMap.from({
  context: new RunnableLambda({
    func: (input: string) =>
      retriever.invoke(input).then((response) => response[0].pageContent)
  }).withConfig({ runName: "contextRetriever" }),
  question: new RunnablePassthrough()
});
Next, it will feed into the OpenAI model the input question and the database retrieved context:
// Feed the input question and the database retrieved context to the model
const chain = setupAndRetrieval.pipe(prompt).pipe(model).pipe(outputParser);
// Invoke the model to answer the question
const response = await chain.invoke(question);
console.log("Answer:", response);
return response;
Easily query the bot using the auto-generated SDK
For querying the bot, a simple React page is created in the client/src/App.tsx file.
The page will have an input box where you can type your question and a button to get the answer.
What is important to notice here is that the BackendService class is already available in the client as an imported package.
The npm package @genezio-sdk/langchain-starter generated by genezio includes all the methods defined in the BackendService class.
This approach makes it easier to call askBot method on the client side.
import { useState } from "react";
import "./App.css";
// Import the BackendService class from the server
import { BackendService } from "@genezio-sdk/langchain-starter";

export default function App() {
  const [question, setQuestion] = useState("");
  const [response, setResponse] = useState("");

  // Define the askOpenAI function that will call the askBot method from the BackendService class
  async function askOpenAI() {
    setTimeout(async () => {
      // Call the askBot method from the BackendService class
      setResponse(await BackendService.askBot(question));
    }, 10000);
  }

  return (
    <>
      <h1>Genezio + OpenAI = ❤️</h1>
      <div className="card">
        <input
          type="text"
          className="input-box"
          onChange={(e) => setQuestion(e.target.value)}
          placeholder="What's your question?"
        />
        <br />
        <br />

        <div>
          <button onClick={askOpenAI}>Get your answer</button>
          <p className="read-the-docs">{response}</p>
        </div>
      </div>
    </>
  );
}
Deploy your application
To deploy your application, run the following command in the root directory of your project:
genezio deploy
Your app will be available at https://<custom-subdomain>.app.genez.io. The custom subdomain is specified in the genezio.yaml file.
You can continue to manage, test, update and monitor your project from the genezio dashboard.
Conclusions
Congratulations! 🥳 You’ve implemented and deployed an application that can handle questions based on your own personal data.
From here, the sky is the limit. You can customize the bot with your own data, add more sources of information, and create more complex applications.
The codebase for this tutorial is open-source, and you can find it in this GitHub repository .
Upcoming tutorials and articles about LLM, Langchain, LanceDB, and Genezio will cover more advanced topics and use cases such as creating a chatbot with memory, scraping custom data from GitHub, and keeping your vector database in sync with your data.
Subscribe to our newsletter to stay in the loop with the latest updates and tutorials.
Resources
This article contains a lot of new concepts and information. If you want a more in-depth understanding of the topics covered, I recommend the following resources:
Article contents
Subscribe to our newsletter
Genezio is a serverless platform for building full-stack web and mobile applications in a scalable and cost-efficient way.
Related articles
More from Tutorials
Implement a newsletter on static websites with Mailchimp or HubSpot
Tudor Anghelescu
Mar 21, 2024
